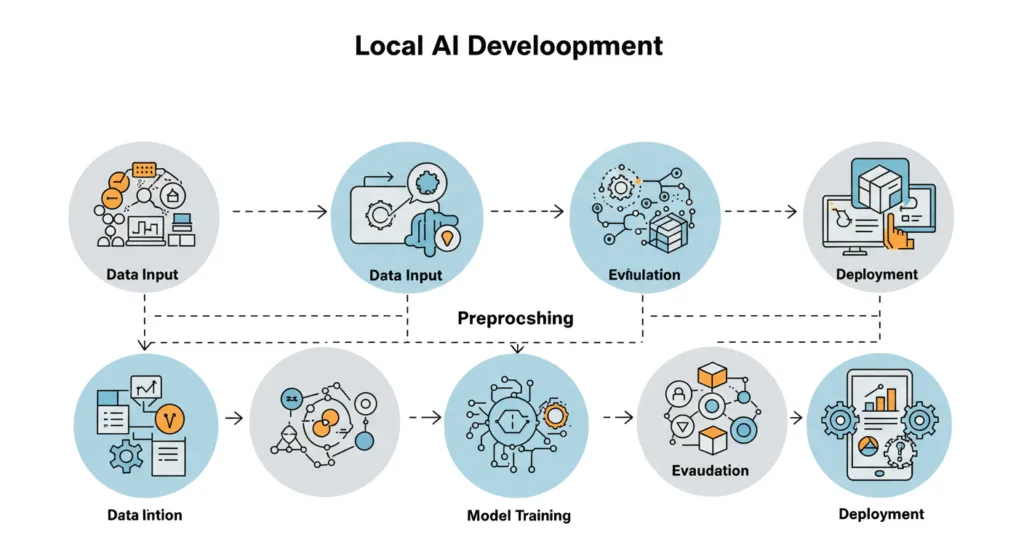
Learn how to build an AI agent locally with our step-by-step guide. Discover tools, frameworks, and tips for deploying your own AI model on your PC.
How to Build an AI Agent Locally: A Step-by-Step Guide
Artificial Intelligence (AI) is no longer confined to large tech companies with massive computational resources. Thanks to advancements in open-source frameworks, affordable hardware, and community-driven tools, it’s now entirely possible — and increasingly popular — to build an AI agent locally on your personal computer or local server.
Whether you’re a developer, student, or hobbyist, this comprehensive guide will walk you through the entire process of setting up an AI agent on your own machine. From choosing the right tools to training and deploying your model, we’ll break everything down into simple, actionable steps.
Let’s dive in.
Why Build an AI Agent Locally?
Before jumping into the technicalities, it’s important to understand why someone would choose to build an AI agent locally rather than using cloud-based services like AWS, Google Cloud, or Azure.
Benefits of Local AI Development
- Privacy & Security: Your data never leaves your machine.
- Cost Efficiency: No monthly cloud fees or API usage costs.
- Full Control: Customize every aspect of the development environment.
- Learning Experience: Deepen your understanding of AI/ML workflows.
- Offline Capability: Run models without internet access.
This makes local AI development especially appealing for developers working on sensitive data, researchers, or anyone looking to learn without relying on external platforms.
What You Need to Build an AI Agent Locally
To get started, you’ll need both software and hardware that can support AI development. Here’s what you should have ready:
Hardware Requirements
- Processor (CPU): At least an Intel i5 or equivalent AMD Ryzen 5 processor.
- Graphics Card (GPU): For faster deep learning tasks, an NVIDIA GPU with CUDA support (e.g., RTX 3060 or higher).
- RAM: Minimum 16GB, but 32GB or more is recommended for larger models.
- Storage: SSD with at least 256GB free space (for datasets, models, and dependencies).
💡 Tip: If you’re on a budget, many lightweight AI models can run efficiently even on older machines.
Software Requirements
- Operating System: Windows, macOS, or Linux (Ubuntu is widely used).
- Python: The most popular programming language for AI development.
- IDE/Editor: Visual Studio Code, PyCharm, or Jupyter Notebook.
- Package Manager: pip or conda.
- Libraries: TensorFlow, PyTorch, scikit-learn, NumPy, pandas, etc.
- CUDA Toolkit (if using NVIDIA GPU): To leverage GPU acceleration.
Step-by-Step Guide to Building an AI Agent Locally
Now that you’ve got your setup ready, let’s walk through each step required to build your very own AI agent.
Step 1: Define the Purpose of Your AI Agent
Every successful project starts with a clear goal. Ask yourself:
- What problem will your AI agent solve?
- Will it be a chatbot, image classifier, recommendation system, or something else?
Defining your use case early helps streamline the rest of the process.
Example Use Cases:
- A chatbot that answers customer queries.
- An image recognition tool for identifying objects in photos.
- A sentiment analysis model for social media monitoring.
Once your purpose is clear, you can move on to selecting the appropriate AI framework and dataset.
Step 2: Choose the Right AI Framework
Depending on your goals, different frameworks may be more suitable. The two most popular ones are:
TensorFlow
- Developed by Google.
- Great for production-grade models.
- Supports Keras for high-level model building.
PyTorch
- Developed by Meta (Facebook).
- Preferred for research and prototyping.
- Offers dynamic computation graphs for flexibility.
Both frameworks support running models locally and have extensive documentation and community support.
Step 3: Install Required Tools and Libraries
Now it’s time to set up your development environment. Let’s go through a basic installation process using Python and pip.
Installing Python and Essential Libraries
# Install Python from https://www.python.org/downloads/
python --version

# Upgrade pip
python -m pip install --upgrade pip

# Install virtual environment
pip install virtualenv

# Create a new virtual environment
virtualenv ai_agent_env
source ai_agent_env/bin/activate  # On Windows: ai_agent_env\Scripts\activate

# Install core libraries
pip install numpy pandas matplotlib scikit-learn tensorflow
If you’re using a GPU, ensure you also install the CUDA toolkit and cuDNN drivers compatible with your GPU.
Step 4: Select or Generate Training Data
Data is the lifeblood of any AI model. Depending on your use case, you might use publicly available datasets or create your own.
Finding Public Datasets
- Kaggle: https://www.kaggle.com
- UCI Machine Learning Repository: https://archive.ics.uci.edu/ml/index.php
- Google Dataset Search: https://datasetsearch.research.google.com
Creating Custom Datasets
If public datasets don’t fit your needs, consider collecting data manually or via web scraping (always respecting privacy and legal boundaries). Labeling tools like Label Studio or VGG Image Annotator (VIA) can help with annotation.
Step 5: Preprocess Your Data
Raw data rarely comes clean and ready to use. This step involves cleaning, transforming, and preparing your data for model training.
Common Preprocessing Tasks:
- Cleaning: Remove duplicates, handle missing values.
- Normalization/Scaling: Standardize numerical values.
- Tokenization: Convert text into tokens for NLP tasks.
- Augmentation: Increase dataset size with synthetic variations (especially useful for images).
Tools like pandas, NumPy, and scikit-learn Provide functions to simplify preprocessing.
Step 6: Design and Train Your Model
With your data prepped, it’s time to design and train your AI agent.
Example: Building a Simple Text Classifier Using TensorFlow/Keras
import tensorflow as tf
from tensorflow.keras.models import Sequential
from tensorflow.keras.layers import Embedding, LSTM, Dense

model = Sequential([
    Embedding(input_dim=vocab_size, output_dim=64),
    LSTM(128),
    Dense(1, activation='sigmoid')
])

model.compile(loss='binary_crossentropy', optimizer='adam', metrics=['accuracy'])

model.fit(X_train, y_train, epochs=5, validation_data=(X_test, y_test))
Training times vary based on model complexity and hardware. Consider starting with smaller models or pretrained ones (like BERT for NLP) to speed things up.
Step 7: Evaluate and Optimize the Model
After training, evaluate how well your AI agent performs using test data.
Evaluation Metrics:
- Accuracy
- Precision, Recall, F1 Score (for classification)
- Mean Squared Error (MSE) (for regression)
Use confusion matrices or visualization tools like TensorBoard to gain deeper insights.
If performance is lacking, try:
- Adjusting hyperparameters (learning rate, batch size).
- Trying a different architecture.
- Increasing training data.
Step 8: Save and Export the Model
Once satisfied with your model, save it so it can be reused later without retraining.
Saving a TensorFlow Model
model.save('my_ai_agent_model.h5') # HDF5 formatYou can also export models in formats like .onnx for cross-platform compatibility.
Step 9: Build an Interface for Your AI Agent
To make your AI agent accessible, create a user-friendly interface.
Options:
- Command-line interface (CLI): Basic input/output interaction.
- Web App: Use Flask or Django to serve the model via a browser.
- Desktop GUI: Tkinter or PyQt for standalone apps.
Here’s a quick example using Flask:
from flask import Flask, request, jsonify
import tensorflow as tf

app = Flask(__name__)
model = tf.keras.models.load_model('my_ai_agent_model.h5')

@app.route('/predict', methods=['POST'])
def predict():
    data = request.get_json(force=True)
    prediction = model.predict(data['input'])
    return jsonify(prediction.tolist())

if __name__ == '__main__':
    app.run(debug=True)
Run the app locally and test it using Postman or curl.
Step 10: Deploy and Maintain Your AI Agent
Deployment means making your AI agent available for real-world use. Since we’re focusing on local deployment, here are some options:
- Run as a background service on your PC/server.
- Containerize with Docker for consistent environments.
- Schedule periodic updates if the model needs retraining.
Also, monitor performance over time and retrain when necessary to maintain accuracy.
Common Challenges and Solutions When Building AI Agents Locally
While building an AI agent locally offers many benefits, it’s not without challenges.
1. Limited Hardware Resources
- Solution: Use lightweight models like MobileNet, TinyML, or distilBERT.
- Consider pruning or quantizing models for efficiency.
2. Slow Training Times
- Solution: Use transfer learning with pretrained models.
- Reduce batch sizes or the number of epochs during testing.
3. Compatibility Issues
- Solution: Stick to one OS/environment or use containers like Docker.
- Keep track of library versions with
requirements.txt.

Advanced Tips for Power Users
Once comfortable with the basics, explore these advanced techniques:
- Model serving with FastAPI or Tornado for better performance.
- Integrate with databases for persistent storage.
- Add logging and error handling for robustness.
- Automate training pipelines using MLflow or Airflow.
These enhancements can turn your local AI agent into a full-fledged application.
Conclusion: Empower Yourself with Local AI Development
Building an AI agent locally is not only feasible but also rewarding. With the right tools, knowledge, and patience, you can develop intelligent systems tailored to your unique needs — all without relying on the cloud.
From defining your agent’s purpose to designing, training, and deploying your model, each step brings you closer to mastering AI development.
So, roll up your sleeves, set up your environment, and start building your own AI agent today!
Frequently Asked Questions (FAQs)
Q1: Can I build an AI agent without coding experience?
A: While some AI tools offer no-code interfaces (like Hugging Face AutoNLP), a basic understanding of Python and machine learning concepts is highly recommended for customization and troubleshooting.
Q2: Is it possible to run large models like GPT-3 locally?
A: Yes, but they require significant hardware resources. Smaller variants like GPT-Neo or LLaMA are more practical for local use.
Q3: Do I need a GPU to build an AI agent locally?
A: Not always. Many models can run on CPUs, though GPUs significantly speed up training and inference, especially for deep learning.
Q4: How long does it take to build an AI agent locally?
A: It depends on the complexity of the model and your familiarity with the tools. A basic project can take a few days, while advanced agents may take weeks.
Final Thoughts
As AI becomes more accessible, the ability to build an AI agent locally empowers individuals and small teams to innovate without limits. Whether you’re automating tasks, analyzing data, or creating smart assistants, local AI development opens doors to endless possibilities.
By following this guide, you’re not just learning how to build an AI agent — you’re taking the first step toward becoming an AI creator.
Share this article with fellow developers and enthusiasts who want to explore the world of AI without depending on the cloud.
